It has been a little while since my last "Tuesday Tip" so I thought tonight would be fitting for a new one. Where have I been, right?! Now that the hectic-ness of the holiday season is over, I'm looking forward to spending more time on my blog. It really is one of my favorite things to do.
So... let's get right to it! After feeling a little, eh, idea-less, I decided to ask one of my close photog girlfriends, Natalie, for a little inspiration for tonight's post. She suggested that I give a glimpse into editing, specifically some insight into how I post processed the photo of Ashley (from Adventure of Newlyweds) that I shared on my facebook page last night. My respose: "PERFECT!" ... and "Why didn't I think of that?" She's a genius. Thanks Nat :)
Tonight I'll be giving you a step-by-step tutorial from beginning to end on exactly how I edited the image of Ashley. Before I begin I thought I'd note that I shot the photograph with my Canon 5d Mark II using a Canon 55 mm 1.4 lens (my fav). I edited this portrait using Photoshop CS2.
SOOC (straight out of camera)
As you will see, I began with a very beautiful photo (duh, look at the subject). Because the composition was exactly how I wanted it, I did not need to crop the image. Does this happen often? No ... haha. I usually have to crop my images.

Step 1: Application of the "soft urban" action.
I use a variety of actions from the Florabella Collection. If you haven't looked into their action sets, I highly recommend them. Since purchasing a few of their packages I have seen a huge transformation in my images. I love them!
The first thing I did to this photo was apply the Florabella action called "soft urban" at 100% opacity. Below you will see the effect.

Step 2: Saturate.
After applying the "soft urban" action at full opacity, I saturated the image just a bit. Saturate can be found with the adjustment tools in Photoshop. Although subtle, you can see that the colors are enhanced. I wanted the greens and browns to pop a bit more than they did in the previous image.

Step 3: Application of "sweetness" action.
Next, I applied the "sweetness" action at 22% opacity. I chose this action to soften the skin and warm the picture. It also gives the image a little bit of a vintage feel, which I love. Again, these are subtle differences but remember: they all add up in the end.

Step 4: Edge burn.
In order to really draw attention to the subject I often burn the edges of the image, which I've done below. Burning can be done using the brush tool. In my opinion, creating a vignette effect really makes the photo pop and the subject stand out. Huge difference, right?

Step 5: Center light.
Because I wanted Ashley's face to be a little brighter, I lightened her face just a bit. This can be done using the brush tool as well.

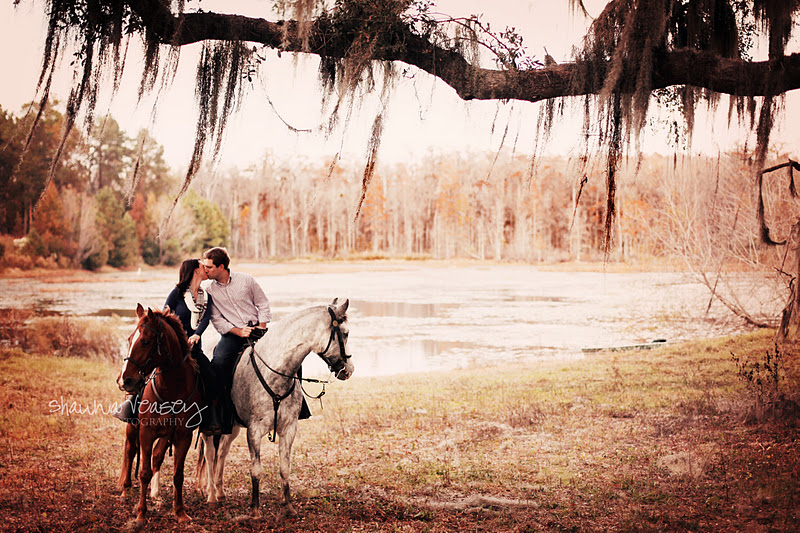
Step 6: Application of "sharpen/defog" action.
I applied the "sharpen/defog" action at 78% opacity. By doing so, the image is crisper, which I think looks more professional.

Step 6: Smooth skin and enhance eyes.
Lastly, I smooth the skin and enhance the eyes by brightening them. Occasionally I may add a little warmth to the cheeks, which I did in this image. Voila!

And for a little before and after to show that those little subtleties do, in fact, count :)

Happy editing! Feel free to leave questions or comments.